Reflective button for roadway: where you mount it and what you choose
A reflective roadway button helps drivers see the edge of the band or a night-time separation zone, on rain or fog. However, not every road marker goes directly on the carousable side. In this guide you see which models exist and where each fits.
In short: check whether the model supports the passing of the wheels, choose the color after the role and stick it on a clean, dry and dust-free surface.
Do you need help choosing?
Tell us what you need and we'll send you the offer on the same working day.
A reflective button for the well-chosen roadway completes the marking with paint and provides a visible landmark even on wet asphalt. For borders, refuges or traffic islands, omnidirectional models and PVC markings remain practical variants. So, start at the mounting place, then choose the color and type of fixation. On public roads, it also takes into account the approved marking project. View all models in category Reflective buttons.
A reflective roadway button is a small element, but its role in traffic matters a lot. At night, on rain or fog, he returns light from the headlights and shows the track of the band. Thus, the driver sees from time to time the edge of the road, a separation of meaning or an obstacle. In this article we explain what models you find in the Protrafic.ro catalog and how you choose correctly.
What makes a reflective button for the roadway
The paint marking looks good on the day, but on the wet asphalt loses its contrast. Instead, a reflective roadway button comes out slightly above the surface and catches light from the small angle. That's why the driver observes the distance guide line. In addition, the relief remains visible when the water partially covers the paint.
At the same time, buttons help in places where the route suddenly changes. A few examples:
- Close curves and exits from the rotating senses.
- Separation of bands at entry into parking lots or industrial areas.
- The margins of refugees and of the islands of traffic.
- The ramps and the access colors, especially where the lighting is missing.
Roadway or edge: where a reflective button goes for roadway
Before ordering, set the exact assembly place. The product data in the catalogue make a clear distinction. Some models go directly on the rolling surface, and others only on the side edges and margins. Therefore, a reflecting button for the roadway has to withstand the passing of the wheels, while a border marker does not have this role.
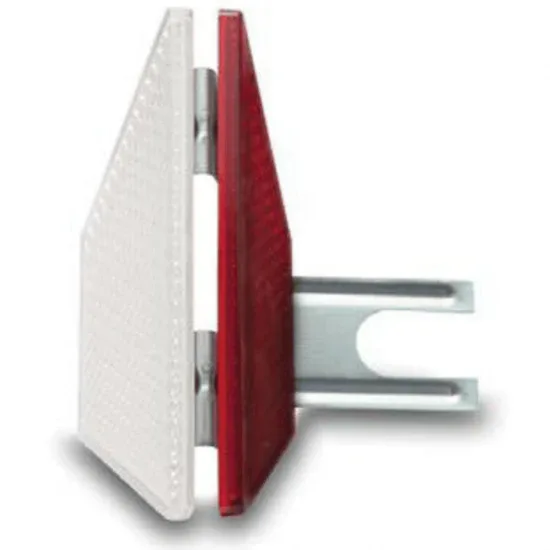
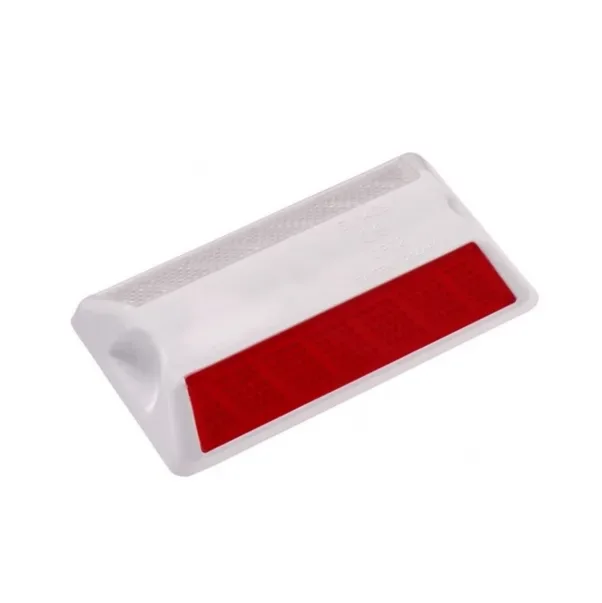
For example, street reflector button aim at the assembly on the edges and on the edge of the road. So, too PVC yellow plastic marker mounts on board, shelter and traffic islands, not in heavy road traffic. Instead, red white plastic marker serve the horizontal road marking and visual guidance. Therefore, read the description of each product before you sit on the circulation band.
Reflective road marker types of the Protrafic.ro range
Category Reflective buttons brings together eight products, with various materials and colours. However, you can easily group them by role:
- PVC plastic markings, in white, yellow or white-red, including the white APT3 model.
- Multi-directional buttons, in white or white red, reflecting light in several directions; the white version mainly covers the edges.
- The element for traffic delimitation, designed for obstacles and separation areas.
- One glass street marker, Available at a minimum order of 300 pieces.
In other words, you don't have a reflective button for good roadway anywhere. Choose the model after the surface, after traffic and after the message you want to transmit the color.
How to choose the color of a reflective road marker
The color sends a message, so you don't just pick it out for taste. In practice, white usually marks the lines of separation and general guidance. The yellow draws attention to the margins, edges or temporary zones. The red, especially near the white, indicates a limit that the driver must not exceed. However, the final marking scheme shall be established by means of the traffic organisation project and according to the requirements of the road manager.
On a public road, a reflective roadway button is part of the official road signage. Therefore, the colors and distances between buttons follow the approved project, not a personal choice. On a private property, like a parking lot or a storage yard, you have more freedom. Even there, it keeps a unitary logic, so that drivers quickly understand the route.
Mounting a reflective roadway button
The correct setting decides how long the button can hold. First, clean the surface of dust, oil and old marking scraps. Then work only on asphalt or dry concrete, because the moisture weakens the grip. Subsequently, use the adhesive or catch system indicated by the manufacturer for the chosen model. Finally, leave the area without traffic while I ask for adhesive instructions.
- Draw the line with string or chalk, so the buttons are aligned.
- It then retains the same distance between the pieces throughout the route.
- It shall direct the reflecting face towards the direction from which the vehicles come.
- Check after a few days if any button has broken or rotated.
Frequent errors in the assembly of roadway reflective buttons
- Mounting a border pattern directly to the treadmill.
- Wet or dusty surface glue, which weakens the grip.
- The mix of logically unspeakable colors that confuses drivers.
- Unregular distances between pieces, especially in curves.
However, all these mistakes are easily avoided with a simple plan, made before the assembly. For example, a sketch with button positions shows you how many commands from time to time.
Regular maintenance and verification
A reflective button for roadway works well only if the optical surface remains clean. The mud, dust and winter salt reduce reflection. Therefore, it deserves a visual inspection at the beginning of the cold season and after work in the area. In addition, the snow plug can hit the relief elements, so check the trail after winter. Missing parts replace them with the same pattern, so the line stays uniform.
What more do you combine with reflective buttons?
Buttons rarely work alone. For example, when entering a parking lot you can associate them with Plastic poles for the separation of bands. On portions with stun marking, help and a refresh with Road marking paint. Thus, the day counts the paint, and the night takes on the role of each reflective button for the roadway. For general traffic rules, you can consult the portal legislatie.just.ro.
Frequently Asked Questions about Reflectorizing Buttons
Can I mount any reflective roadway button on a hard-traffic street?
Nope. Some of the models in the category only cover the edges and side edges. For hard traffic you choose a model whose description allows the passing of wheels, and on public roads decides the approved project.
What does omnidirectional button mean?
I mean a button that reflects light from multiple angles, not just from one direction. You use it, for example, on visible edges of both senses.
Is it worth the glass marker for a private yard?
The glass street marker has a minimum command of 300 pieces. Therefore, it is particularly consistent with large projects, not a small court.
How often do I check a reflective button for the roadway?
We recommend a check at the beginning and end of winter, plus after any work in the area. Thus, you replace the pieces of unopened or dirty in time.
If you prepare a marking project, see the full range of Reflective buttons and compare the models after the mounting place. Protrafic.ro helps you choose a reflective roadway button suitable for the surface and traffic in your area.